The paper for this party
The Mermaid Birthday invitation and the coordinating favor tags are separate products. Choose the invitation for guests, then add the tags if you are sending a favor home.
From the QDP paper cupboard
The invitation and its finishing touch
The mermaid invitation and favor tags are separate digital purchases. Bags, craft supplies, decorations, and other matching-suite pieces are not included.
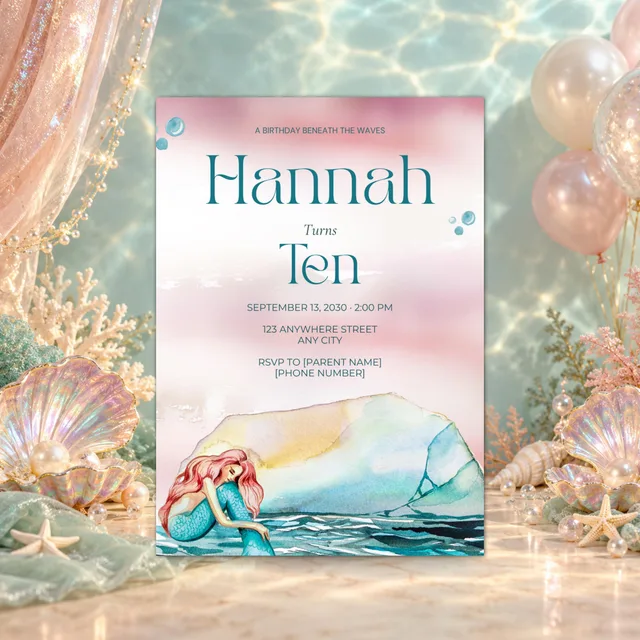
Mermaid Birthday invitation
5 × 7 in + 1080 × 1920 px phone format
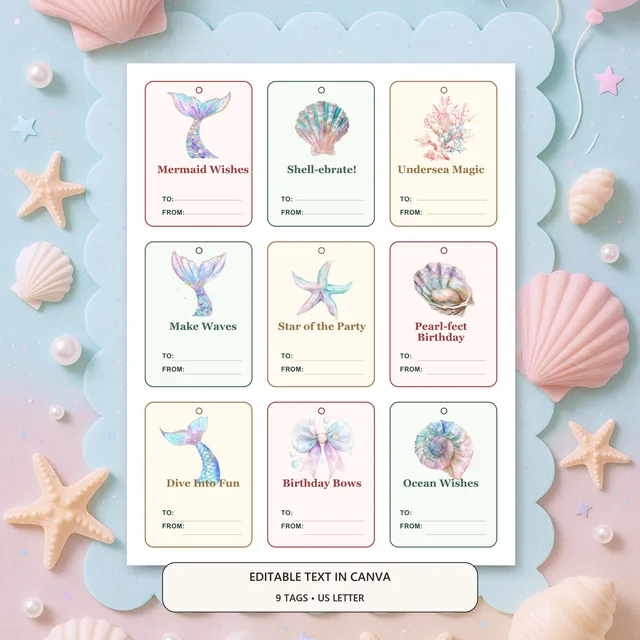
Mermaid birthday gift tags
US Letter sheet · 9 tags
The party, at a glance
A plan to make your own.
- The mood
- Sea glass and shell pink with a deeper lagoon accent.
- The main activity
- An imaginary underwater gallery made by the guests.
- The paper pairing
- A mermaid invitation and separately sold favor tags.
Ask what their underwater world looks like
Let the birthday child choose one detail that matters to them. Perhaps it is a mermaid’s garden, a mysterious palace, or funny sea creatures. That answer can guide the activity and a cake detail, while the QDP invitation gives the paper a consistent visual starting point.
The current QDP mermaid invitation is presented as a tenth-birthday design and includes a 5 × 7 inch version plus a 1080 × 1920 phone format. Check its editable fields and wording for your celebration before buying. The styling ideas here can be adapted to different birthdays, but that does not make every template suitable for every age.
Let shimmer be something you discover
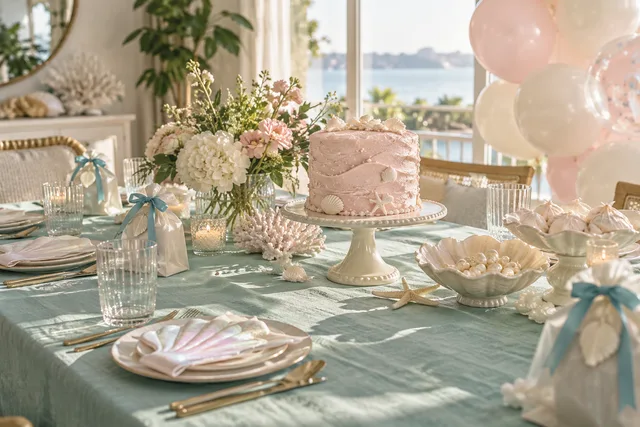
Spread sea glass and pearl across the larger surfaces, then use shell pink near the invitation or cake. A deeper lagoon detail gives the pale colors definition. Choose one reflective material, such as a pearly paper decoration, and look at it in the room where the party will happen.
Move the sample around until it catches the light without becoming a bright patch in photographs. Keep nearby paper and serving pieces mostly matte. You can suggest water through color and curved paper shapes; an indoor mermaid afternoon can have plenty of atmosphere without needing a pool or beach.
Make an underwater gallery together
Cover an activity table and set out paper with drawing materials appropriate for your guests. Invite each child to invent something that might live in a mermaid’s world: a reading-room octopus, a shell-shaped house, or a fish with an extraordinary job. Younger guests can draw freely; older children might add a name and a short description.
Reserve a wall or board for the finished pictures and have an adult help display them. Put each child’s name on the back so the artwork finds its owner later. Give guests time to walk around the gallery before cake. Their work becomes part of the room while everyone is still there to enjoy it.
Give the afternoon a gentle rhythm
Here is a sample order for a small indoor gathering. Adjust the pace to the children attending, the meal you are serving, and any adult help you have. Keep a simple drawing option available for guests who arrive early or want a quieter moment.
- Arrive and settle: greet each guest, show them where belongings go, and point out the activity table.
- Make and explore: introduce the imaginary gallery, then let children work at their own pace.
- Eat and celebrate: gather for food and cake, with enough time for conversation.
- Take the story home: return each picture and offer a favor if you have chosen to include one.
Connect the table and the take-home detail
Keep the menu familiar and let a few paper details carry the ocean mood. Plain plates and napkins in the chosen colors can sit beside one themed cake detail. Leave a separate clear surface for serving so the children’s artwork and materials stay away from the food.
For favors, a small drawing pad can continue the gallery idea at home. QDP’s mermaid favor tags are sold separately from the invitation and print nine per US Letter sheet. Each tag is approximately 2.36 × 3.20 inches. Test one sheet at the intended scale before printing the rest, and check that the tag suits the size of your chosen bag.
Prepare the parts you can finish early
Print and proof the paper, name the art-storage envelopes, and arrange the activity materials before party day. Count the seats and drawing spaces rather than relying on a styled photograph to tell you what fits. Save a space for one more guest if your table allows it.
On the day, check the invitation details against the actual setup: arrival time, collection arrangements, and any information families need. Place finished favors near the exit and give a helper the guest-art collection job. Keep the color story gentle enough that a room full of new drawings feels like the best final decoration.
Build the party around something children can imagine and make. Let the paper connect the invitation, the room, and the way home.
Further reading from the party community
These independent blogs offer other interpretations of the theme. The plan above is original QDP editorial; reference features and photographs belong to their credited creators.